To plant sod in Texas: remove vegetation (weed wacker), till the soil, taper edges, add topsoil, and smooth the area. Lay sod in tight staggered rows, cut edges, and finish by soaking and rolling the lawn with a 250-pound roller for even rooting. Then soak the lawn for 10 to 14 consecutive days.
This method of installing sod incorporates parts of Texas A&M Agriculture’s method for installing sod (Richard L. Duble – “Turfgrasses Their Management and Use in the Southern Zone”)
There are other ways to install sod, however we (On Point Contractors) have found this method to work best. It also helps that it incorporates the methods backed by Agriculture science.
Below is the standard operating procedure for installing sod with On Point Contractors:
Pre-Jobsite
Test Soil
Test Ph and light levels. Also probe soil in different areas to test soil quality. Ph should be between 6.0 and 7.8.
811 DIG
Schedule 811 DIG to mark lines on property
CONFIRM 811
Make sure DIG has marked lines
Pre-Prep
Test Sprinkler Zones
Test ALL zones (even zones not covering lawn to be installed) and mark all sprinkler heads with flags
Note Down Issues
Note down any broken irrigation parts and take pictures of it. Note down if anything is not working properly, especially zones not working.
Flag Property
Mark all visible valve boxes and anything on property that could be damaged with a tiller
Mark Property Lines
Mark property lines (with marking paint)
Mark Areas to be Tilled
Mark where lawn will be tilled (good Idea to reconfirm with homeowner before tilling)
Prep
Scalp Existing Lawn
If there is established lawn, weed wack (scalp) to prep,
Rake and Bag Grass
THOROUGHLY rake out all grass and put in bags. Only put grass in bags. Not dirt.
NO DIRT IN BAGS!
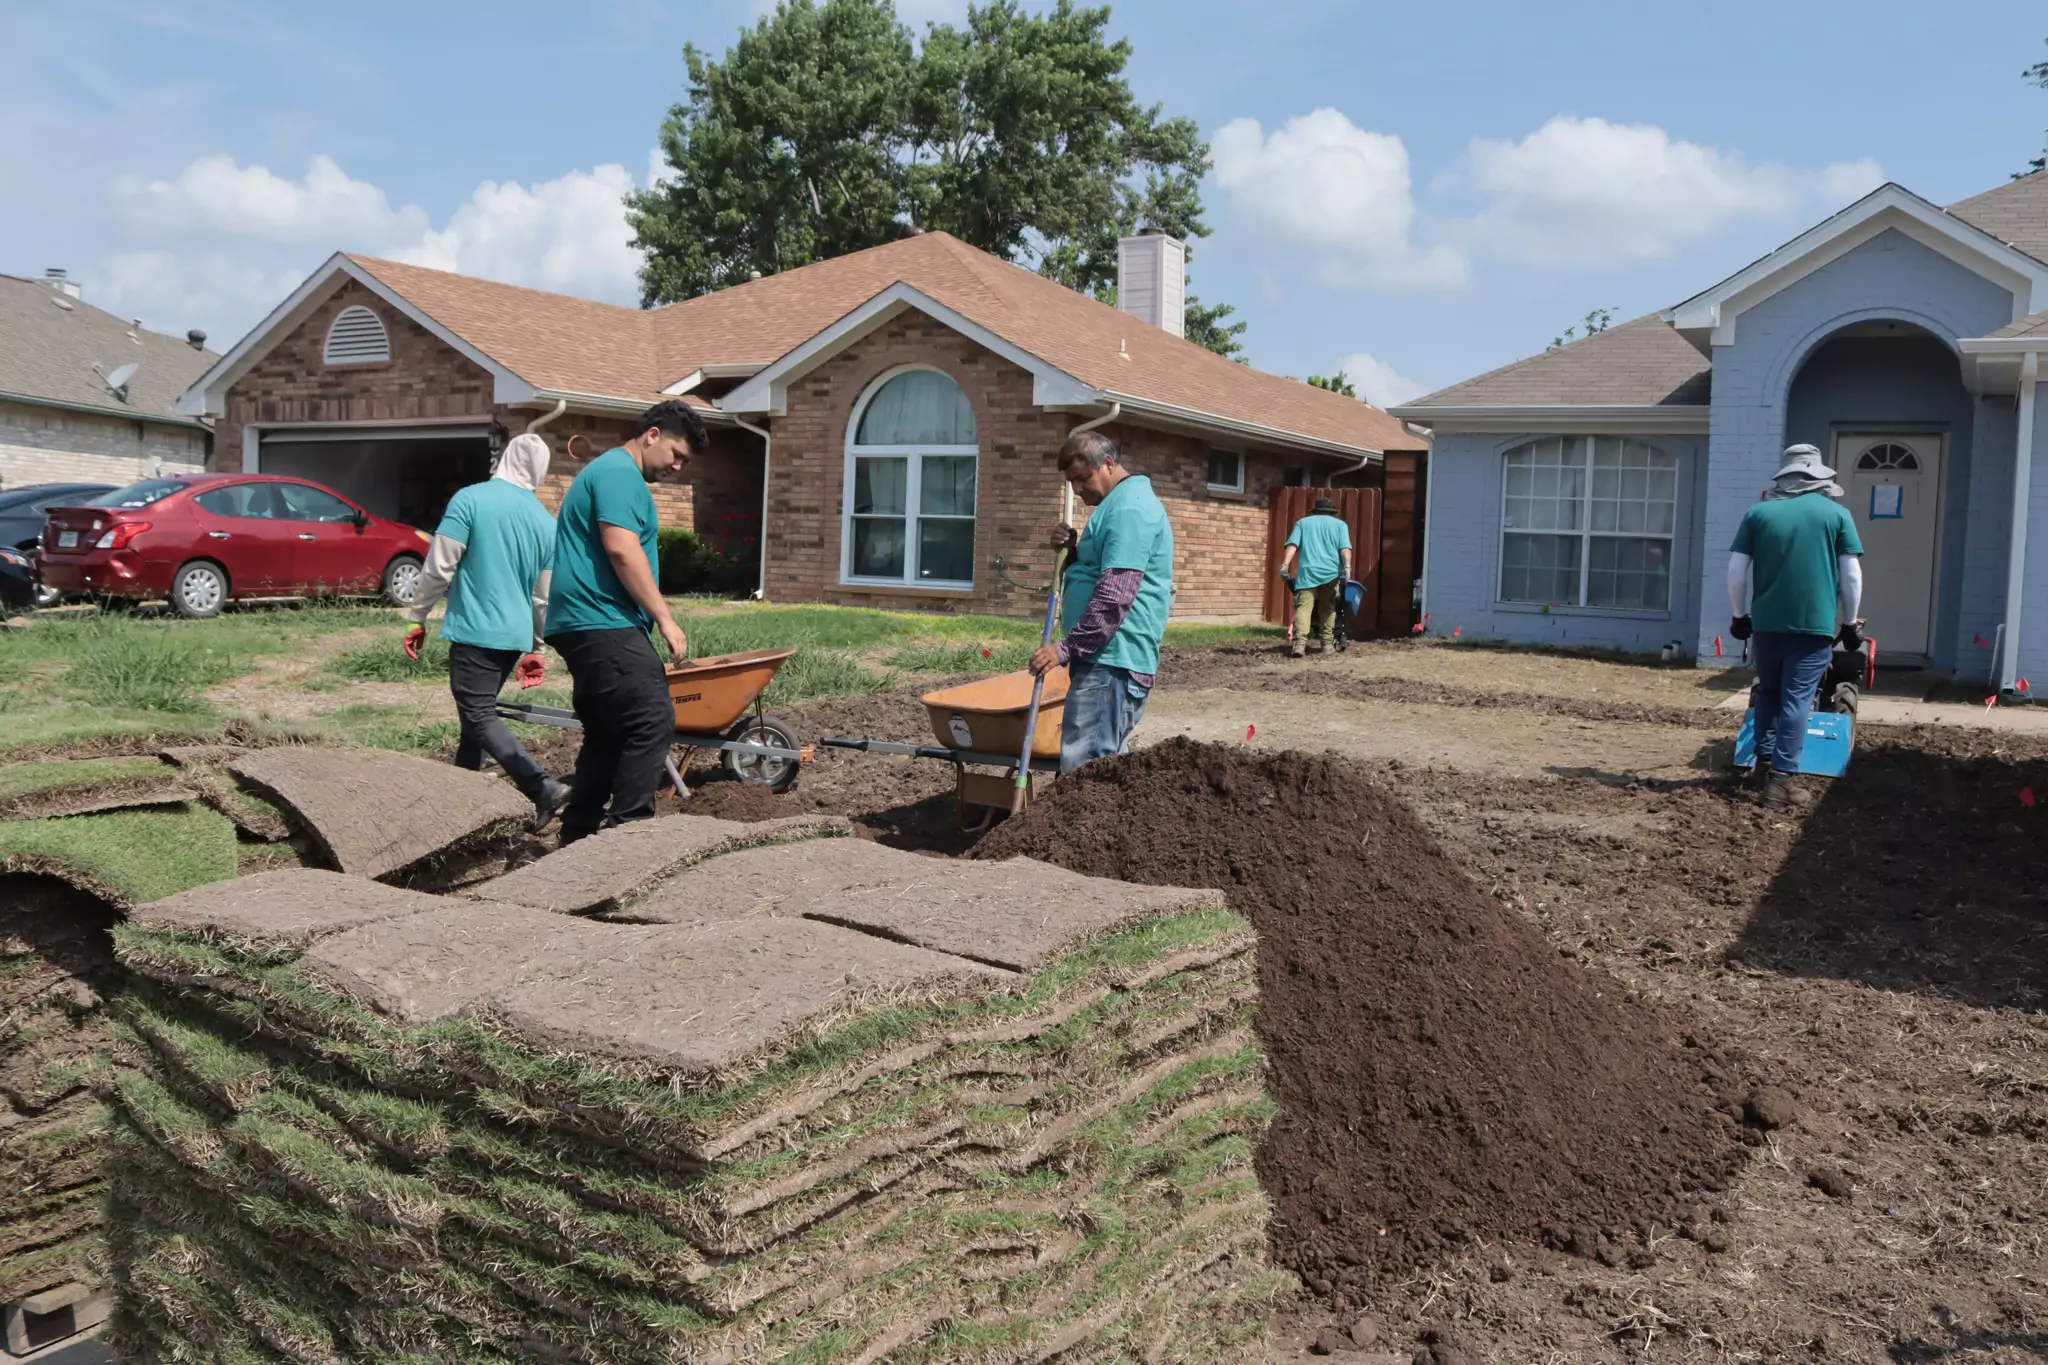
Till
Till marked areas
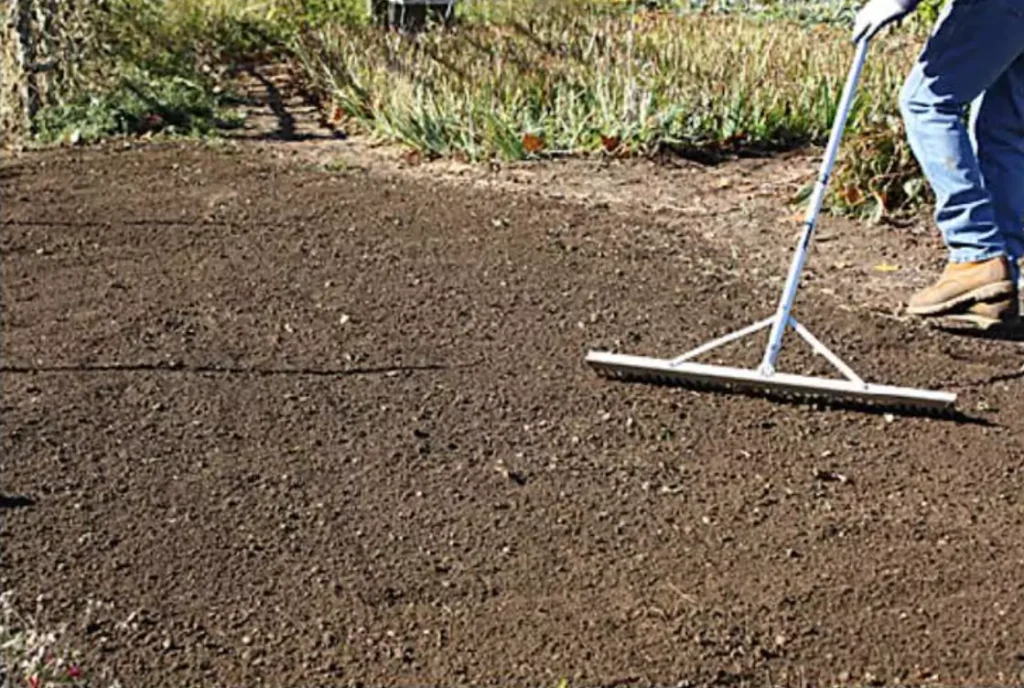
Smooth and Level with Rakes
Smooth out tilled areas with rakes. Make sure to smooth as flat as possible. You can also lightly roll out the soil with a half filled roller to expose low spots and fill them in. A pivoting leveling rake is recommended for smoothing the soil.
Edging
Taper all edges of tilled areas to make sure planted sod will be flush with either existing grass or sidewalks/driveway/pathways
Installation
Lay Sod
Starting with the longest straightest line, Lay the sod
If there will be a lot of wheelbarrowing, start on the farthest part of the yard so that you do not wheelbarrow over newly laid sod.
Make sure Sod is Staggered
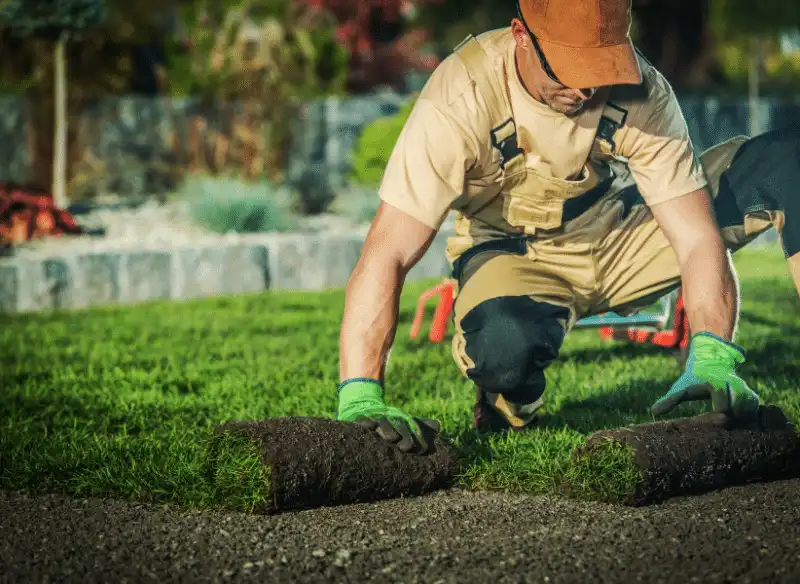
The sod MUST BE STAGGERRED (lay the sod like bricks)
Water Sod while Laying
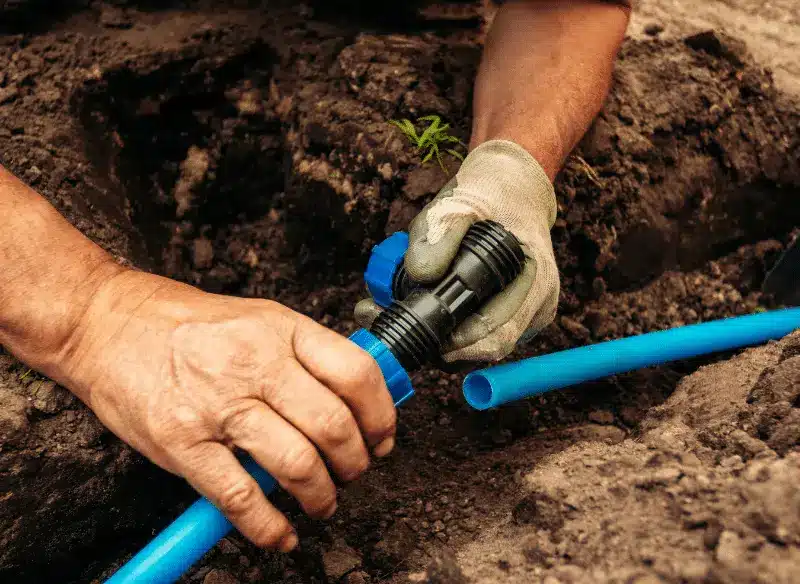
While laying sod make sure that the sod is being watered as it is being layed (you can lay out a walmart sprinkler connected to a hose to water the sod. You can move it as you lay sod.)
Cut Sod
Make the needed cuts (on edges and around sprinkler heads) as sod is being layed
Clean Up Debris
Clean up all debris and cuts
Soak & Roll Sod
Make sure sod is soaked, then roll it with a 250 lb roller, multiple times if needed
Test Sprinklers Again, Make Repairs
Test all sprinkler zones and make necessary repairs if we broke anything that was marked by us (and working) before we started work.
Raise Heads
Raise all heads that need to be raised in order to water the newly planted sod
Post-install
Clean Up
CLEAN UP (This Step must be followed every day at the jobsite) – Make sure Job site is clear of all trash and debris. Anything we need to leave on the property is neatly placed where the customer wants.
Sweep where needed and hose down where needed.
Property MUST LOOK IMMACULATE. It needs to look as good if not better than when we got there.
Pathways, walkways, sidewalks of any kind must always be left unobstructed! UNLESS we need to block it off for safety reasons.
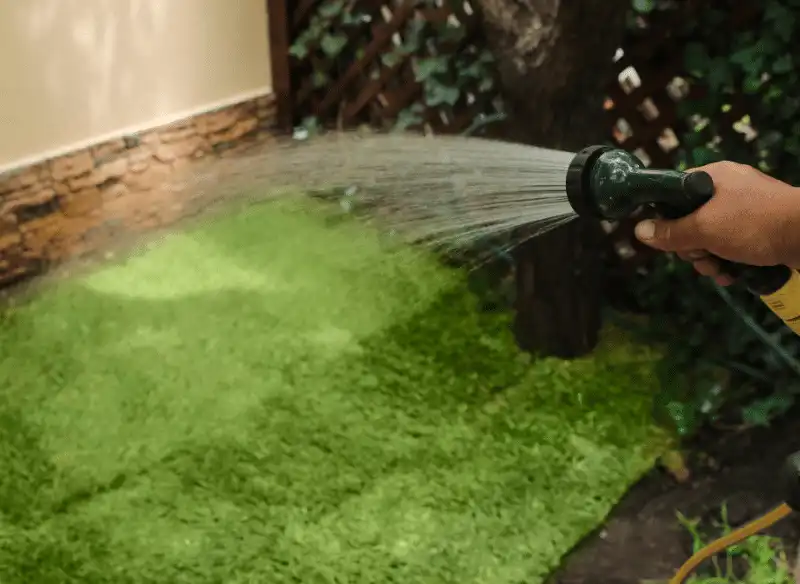
Program Spriklers
Program the sprinkler system to soak the sod for the next 10 to 14 days
General Rules to Follow
General rules to follow (very dependent on season)
Every zone that has even 1 head covering sod must be programmed for soaking.
Each zone needs 20 to 40 min/day EVERY DAY, for 14 days. Split the running times into 2 or more time periods for each zone. Run Rotary heads 3 to 5 times as long as spray heads.
Watering should start at around 4:30 am.
Factors to consider for watering schedule: SOD type, Amount of shade, Slope, How well water drains through the soil, time of year, heat…
Don't Leave Property Unless Sprinklers Work
MAKE SURE THE SPRINKLER SYSTEM IS ON AND ON THE RIGHT PROGRAM! DO NOT LEAVE THE PROPERTY UNLESS THE IRRIGATION IS PROGRAMMED PROPERLY.
That’s the quick rundown on how to plant sod in Dallas Fort Worth Texas.
For those of you that want more in-depth details, let’s get into it… for more details I highly recommend Richard L. Duble – “Turfgrasses Their Management and Use in the Southern Zone”
What are the Steps to Plant and Establish SOD?
Here are the basic 4 steps for the successful establishment of SOD
- Proper Site Preparation
- Selection of the right SOD (Turfgrass)
- Planting of the SOD
- Care and Maintenance after planting
There is an outline on the steps for an installation on a typical residential SOD installation which goes through everything from the pre-jobsite tasks, to dealing with the sprinklers, to planting the SOD, and informing the customer on how to care for the SOD.
These next few steps are the general concepts for successful establishment of SOD
1. How To Prep a Jobsite for SOD
Here is the outline:
- What is the state of the Seedbed
- Uniformity – The seedbed must be uniform
- Weeds and Existing Grass Must Be Removed
- The Soil Needs to be Cultivated (Tilling is a Common way to Cultivate)
- Soil Modification (more rare, but we have done this from time to time)
- GRADING (smoothing and setting the slope of areas)
a. The Seedbed
Like the strength of a building comes from the foundation, the seedbed (or soil) is the support for SOD. The seedbed is the several inches of soil that are tilled and possibly modified for planting. Poor Seedbed conditions, just like a bad building foundation, can cause Long Term maintenance effects for the lawn.
It’s all about the prep! Repeat it with me… It’s all about the prep!
Bad Seedbed examples:
- Severe slopes
- Shallow topsoil
- Compacted soils
- Poorly prepped soil (not tilled properly)
- Soil littered with construction debris like concrete, sand, other…
b. Uniformity - The seedbed must be uniform
You want the area of planting to have a uniform first 2 inches of soil. This means rocks and debris from the first 2 inches should be removed in order to provide even root growth for the SOD.
Tree stumps, and other organic materials, should be removed rather than covered in topsoil because it will cause the damage of the Grass above it in the long term. The organic material can heat up when decomposing.
c. Weeds and Existing Grass Must Be Removed
The less weeds and grass that is on the jobsite before planting SOD, the better. However, it does not have to be perfect.

- One way to remove existing vegetation (weeds and grass are forms of vegetation) is to scalp the area with a weed eater and rake out the material
- As long as 70% of the existing weeds and grass is removed, you can plant SOD successfully
This is not common with our SOD installation process, however in some extreme cases it may be required to STERILIZE the lawn with “methyl bromide”, “vapam”, or similar products.
In general you do not want to use herbicides before planting SOD because it can damage the new SOD.
d. The Soil Needs to be Cultivated (Tilling is a Common way to Cultivate)
Tilling is absolutely necessary for prep and is very effective in removing most weeds. It is typically effective up to 4 inches deep.
It is more rare, but if we needed to cultivate (rough up the soil) deeper than 4 inches, there are methods we can do using a chisel, plow, or disk. We typically never need to do deeper than 4 inches.
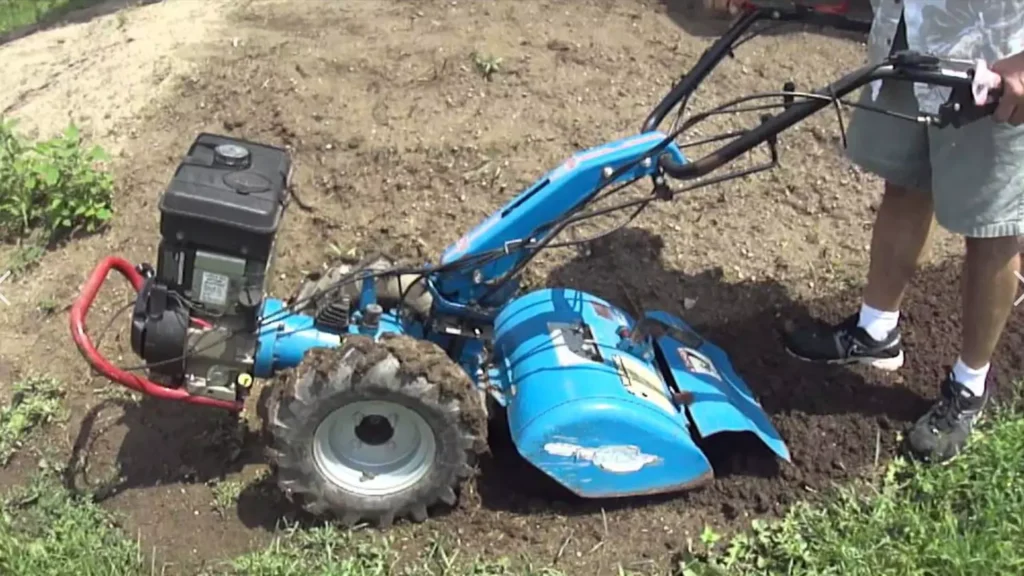
- A rototiller can effectively pulverise and mix the top 4 inches of soil.
- If we are adding organic material, it is best to rototill it in.
e. Soil Modification
Prior to planting grass, some sites need to have the soil modified.
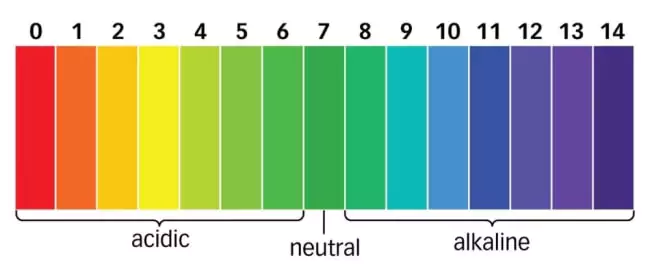
The best pH level for grass is typically from 6 to 7.4. Remember, 0 to 7 is acidic, 7 to 14 is basic (ar alkaline), with 7 being neutral (not basic or acidic).
Acidic (low pH) soil – For extremely acidic soil, the top 4 to 6 inches needs to have limestone added.
Basic, or alkaline (high pH) soil – We can add sulfur and/or gypsum
For both cases, acidic or basic, the material will be spread on the surface and then rototilled into the soil.
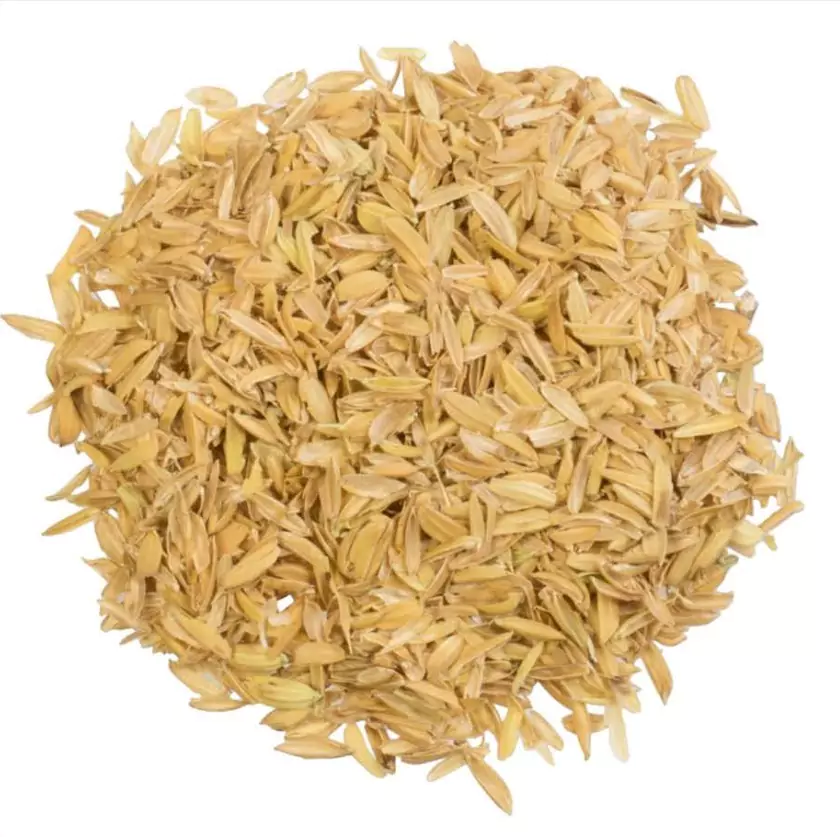
MOST soils would benefit with the addition of organic material such as:
- Peat
- Composted bark
- Sawdust
- Rice hulls.
WHY?
- they improve soil aeration
- increase nutrient content
- improve drainage
- reduce compaction
- improve microbial activity
Some aggregate material examples that would also improve soil conditions:
- Turface
- Greenschoice (Soil Pro)
- Isolite.
How much organic material?
- You need to put in about 10% to 15% (by volume) in the top 4 to 6 inches of seedbed.
f. GRADING (smoothing and setting the slope of areas)
Grading will be more significant on larger projects using tractors and large machinery, however grading is commonly used in smaller residential projects on existing homes as well.
- Drainage is the most important factor in the establishment of SOD, and grading can help establish a drainage area.
- It is often necessary to cut (till more intensely) high areas and fill in low areas (either with added topsoil or from other tilled areas).
- However, this is typically done with large machinery for serious grading, and is referred to as rough grading.
- The goal of grading is to direct water away from critical areas like buildings and driveways.
- Avoid steep slopes because establishment of grass is difficult, and steep slopes can cause erosion.
Gentle slopes are ideal for grassy areas. - 0.5% minimum to 2 % slope maximum is ideal.
Retaining walls can be put in to help reduce severity of slopes. Example on what a percent slope means… ( 2% slope would mean if you start at one point, then 100 feet from that point it will be 2 feet higher than the original point. It is a triangle.
If doing serious grading, and TOPSOIL is needed, then grade stakes will need to be used and strings strung to get the desired soil heights. Then, use rough grading to establish uniform depth of soil. AT LEAST 4 to 6 inches of topsoil is needed for grass areas, but 6 to 8 inches would be desirable.
Once topsoil is in place and any amendments to the soil is added, then finish grading needs to be done.
Finish grading – This is when we smooth and firm the topsoil in preparation for the site. We do this by hand on small sites and for bigger sites we can use a box blade or grader. When contours are set, a heavy steel mat or carpet drag can be dragged along the surface. It might be necessary to also firm the soil by rolling it out.
Final grading – Final grading is done after the site has been rolled, or after the site has had time to let rainfall or irrigation settle the soil.
Final grading is the most common type of grading we do for residential projects. Simply grading a layer of topsoil (usually about 2 to 4 inches thick) by hand using rakes.
We DO NOT let rainfall settle the topsoil for finish grading.
We spread the topsoil and plant sod right after.
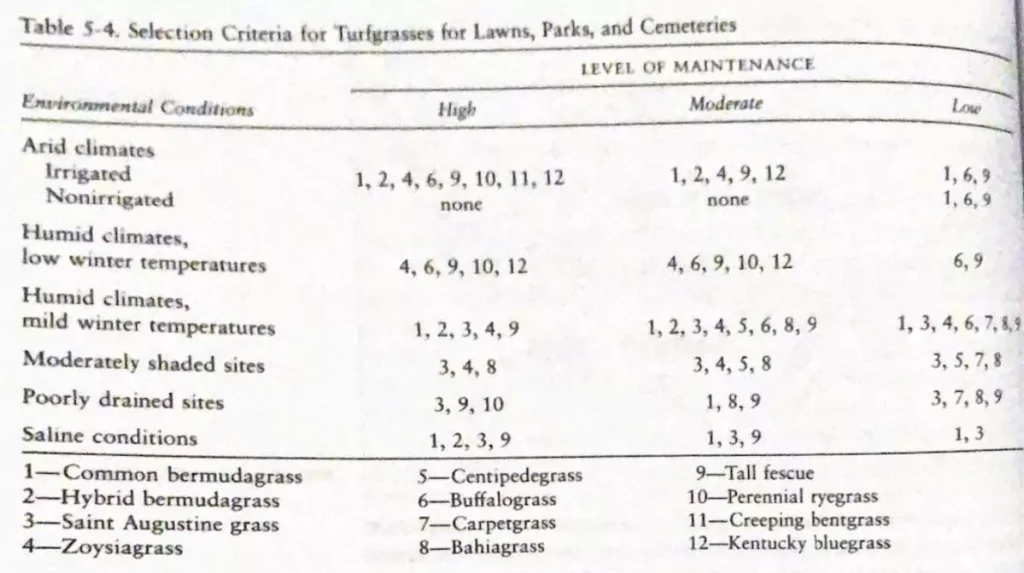
2. How To Select The Right SOD?
Use the SOD guide provided to help determine what SOD is appropriate for site conditions.
Of about 25 species of turfgrass, only 10 species are used in the southern states.
Major factors to consider
- Shade, or light intensity.
Even grasses with high shade tolerance still require a minimum of 30 % sunlight (which may be about 3 to 4 hours of direct sunlight (or 6 to 8 hours of spotted sunlight)) - If a turf is not to be mowed more than once or twice a month
A low maintenance grass must be selected – like zoysia. - If a site cannot be watered often
A drought tolerant grass like Bermuda Grass is required. - Turf use
Areas with high traffic like sports fields or even homes with pets will need grass that can tolerate high traffic like Bermuda.
Below is a chart that can be used for selecting the right type of grass. There are other charts with different factors, this is just one.
*** Higher maintenance implies frequent mowing, regular watering, several applications of fertilizer each year, and a pest control program. ***
3. How to plant Sod grass?
Methods
There are 3 main ways to plant grass. Other methods exist, but we will not cover them.
- Seeding – Spreading and maintaining of seeds – This method is the most effortful and risky
- Planting plugs – Planting plugs (or chunks) of a grass spread apart in an area and letting it fill in the gaps over time.
- SODDING – Laying of SOD slabs
When to plant Sod?
- SOD CAN BE EFFECTIVELY PLANTED ANY TIME OF THE YEAR!!! (As long as the proper irrigation is available) The summer months will be the most difficult because of the heat.
- Best times to plant if seeding or using plugs – For bermuda, St augustine, and Zoysia, here in Dallas it is typically best to plant during spring and early summer (again, SOD can be planted any time of year and do well)
How?
When sodding, it is important to
- Lay the SOD like bricks over the prepared, smooth, seedbed.
- The seedbed must be rolled or settled by rain before sodding.
- When SOD is laid, the soil must be moist! Not wet or dry, MOIST. It is good practice to water the SOD as it is being planted (can be done with a portable sprinkler as shown in a picture below).
- SOD must be rolled to eliminate air pockets and to establish a firm contact with the soil.
Even though sodding makes the installation much faster and easier than seeding, a poor prep of the soil (seedbed) can cause many problems in the future.

Portable lawn sprinkler
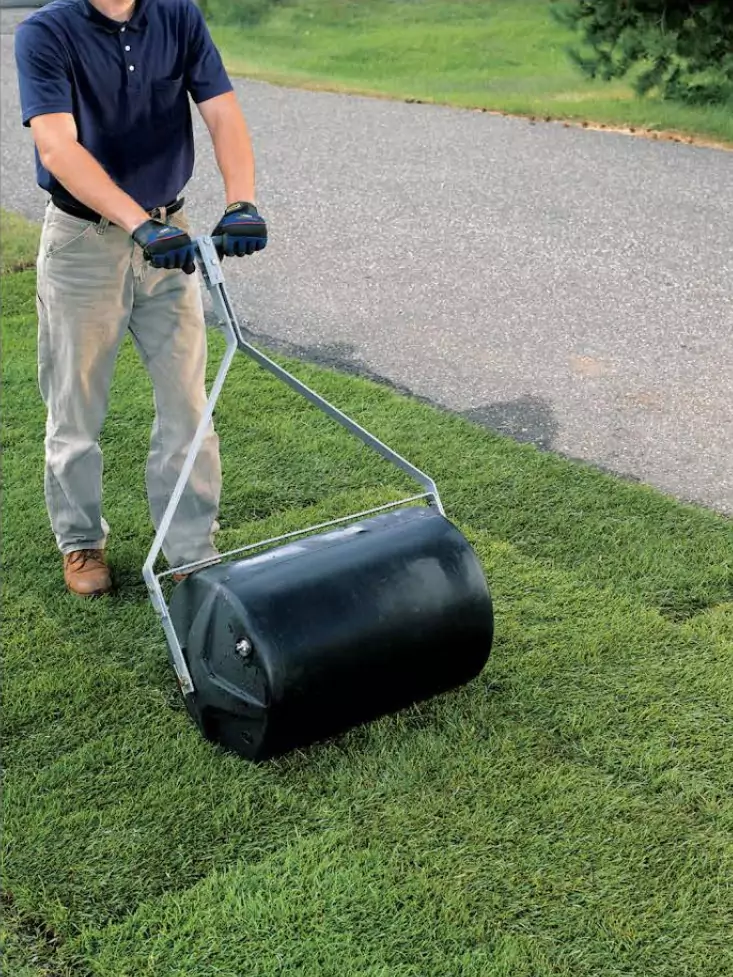
Lawn roller (this size weighs 250 lb when full of water)
And that’s how to install sod!